Pro Techniques
Prevent Pie Crust Edges from Burning with Foil
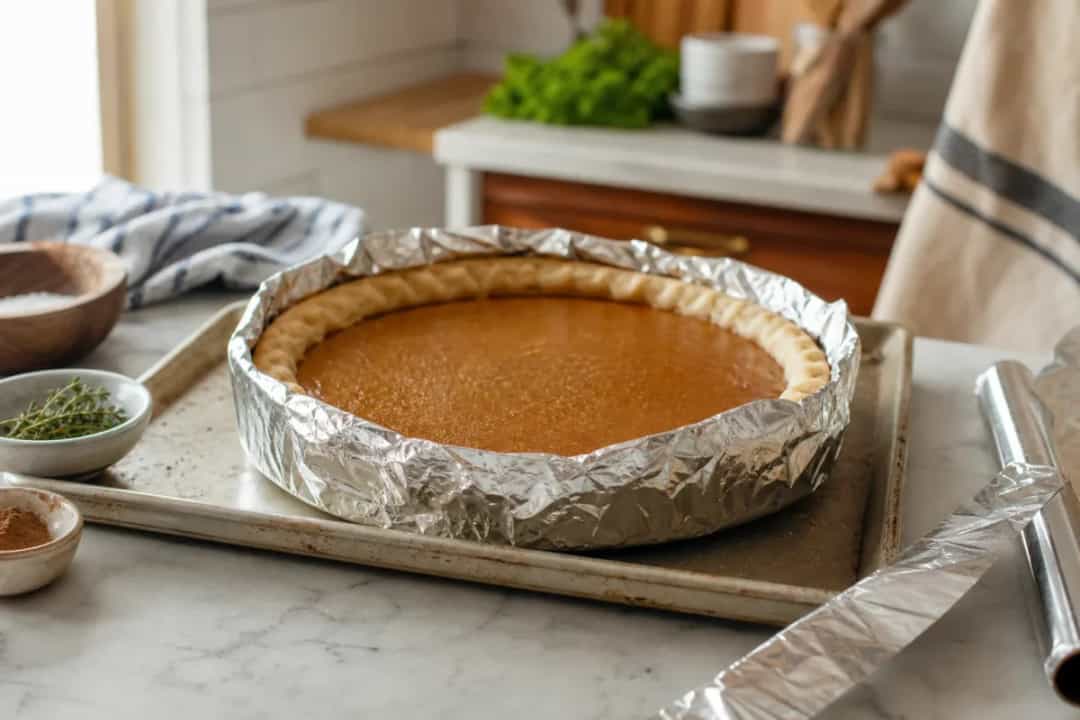
Baking the perfect pie is an art, but burnt crust edges can ruin even the finest fillings. The aluminum foil shield method is a simple yet effective solution that ensures your pie looks as good as it tastes. Here’s how to do it right!
How to Create a Foil Shield
- Cut Your Foil: Start with a piece of aluminum foil that is about 12 inches long. This gives you enough material to form a protective barrier around the edges of your pie crust.
- Shape the Shield: Fold the foil lengthwise in half to create a sturdy strip. Depending on your pie pan size, you may need to adjust the length and width of the foil.
- Form a Collar: Gently curve the foil strip into a ring or collar shape, ensuring it can rest just on top of the pie crust edges without covering the filling.
When to Apply the Shield
- During Pre-Baking: If your recipe calls for a pre-baked crust, apply the foil shield halfway through the baking time to prevent burning.
- After Initial Baking: For pies that bake longer, apply the shield once the crust is golden brown, usually about 20-30 minutes into the baking process.
Tips for Effective Use
- Secure the Shield: Make sure the foil isn’t too loose; it should rest snugly against the crust to prevent exposure to direct heat.
- Use Non-Stick Foil: If you have it, non-stick aluminum foil can make removal easier after baking.
- Check for Browning: Keep an eye on your pie; if it starts to brown too quickly, adjust the shield as needed.
| Item | Amount | Notes |
|---|---|---|
| Aluminum foil | 12 inches | Cut for shield |
| Pie crust | 1 | Standard size for most pies |
| Baking time | 20-30 min | Apply shield halfway through |
Pro Tips
- If you want to spice things up, use parchment paper instead of foil for a more eco-friendly option.
- For deep-dish pies, consider reinforcing the shield with two layers of foil to provide extra protection.
- Always let your pie cool slightly before removing the foil to avoid tearing the crust.
Safety Note
Be cautious when handling hot foil to avoid burns. Let your pie cool before removing the shield to ensure your crust stays intact.
Conclusion
The aluminum foil shield method is a straightforward technique that any home baker can master. By following these steps, you can enjoy beautifully baked pies with perfectly browned crust edges. Don't hesitate to try this tip next time you bake!
Frequently Asked Questions
- How long should I bake my pie?
- Baking times vary, but most pies bake for **45-60 minutes**. Apply the foil shield after about **20-30 minutes**.
- Can I use a different material instead of foil?
- Yes, parchment paper can be a good alternative to foil for creating a shield.
- What if my pie crust is already starting to burn?
- If you notice burning, cover the edges with foil immediately to prevent further charring.
- Do I need to remove the foil during baking?
- No, leave the foil shield on until the pie is fully baked to protect the crust edges.
- Is this method suitable for all types of pies?
- Yes, this method works well for both fruit and custard pies that require baking.